
Microsoft Entra ID - SCIM
Configure automatic user provisioning (SCIM) with Microsoft Entra ID to sync users between Azure and Wintro.
This guide outlines the steps for setting up automatic user provisioning between Microsoft Entra ID (formerly Azure Active Directory) and Wintro using SCIM 2.0. With SCIM configured, user accounts are automatically created, updated, and deactivated in Wintro based on changes in your Microsoft Entra ID.
Note: SCIM user provisioning is an Enterprise feature available on select Wintro plans. If your plan doesn’t include SCIM, please contact our sales team to upgrade.
Note: SCIM provisioning syncs every 40 minutes. Initial provisioning may take up to 40 minutes to reflect in Wintro.
Prerequisites
Before starting the SCIM configuration, ensure you have:
- Admin access to your Microsoft Entra ID tenant
- Admin role in your Wintro organization
- A Wintro plan that includes SCIM functionality (Enterprise plan)
- Microsoft Entra ID Premium P1 or P2 license (required for provisioning)
- Users in Microsoft Entra ID with complete profiles (email, first name, last name, display name)
Important Limitations
- Required fields for all users:
- Valid email address (used as primary username)
- First name (given name)
- Last name (family name)
- Display name
- Users missing any required fields will fail to provision
Already have SSO configured?
If you already set up Microsoft Entra ID SSO, skip Step 1 and use your existing Wintro enterprise application. Open it in Enterprise applications and go straight to Step 2. This ensures user and group assignments carry over between SSO and SCIM.
If you’re setting up SCIM without SSO, follow Step 1 below to create a new application.
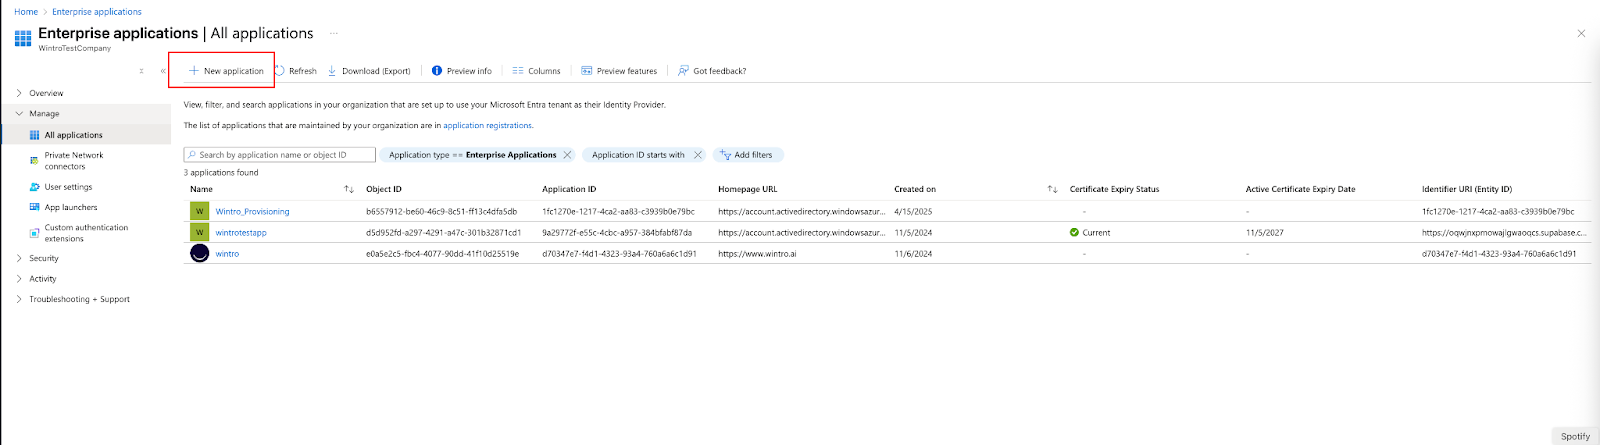
Step 1: Create Enterprise Application for Provisioning
- Sign in to the Microsoft Azure Portal
- Navigate to Microsoft Entra ID > Enterprise applications
- Click + New application
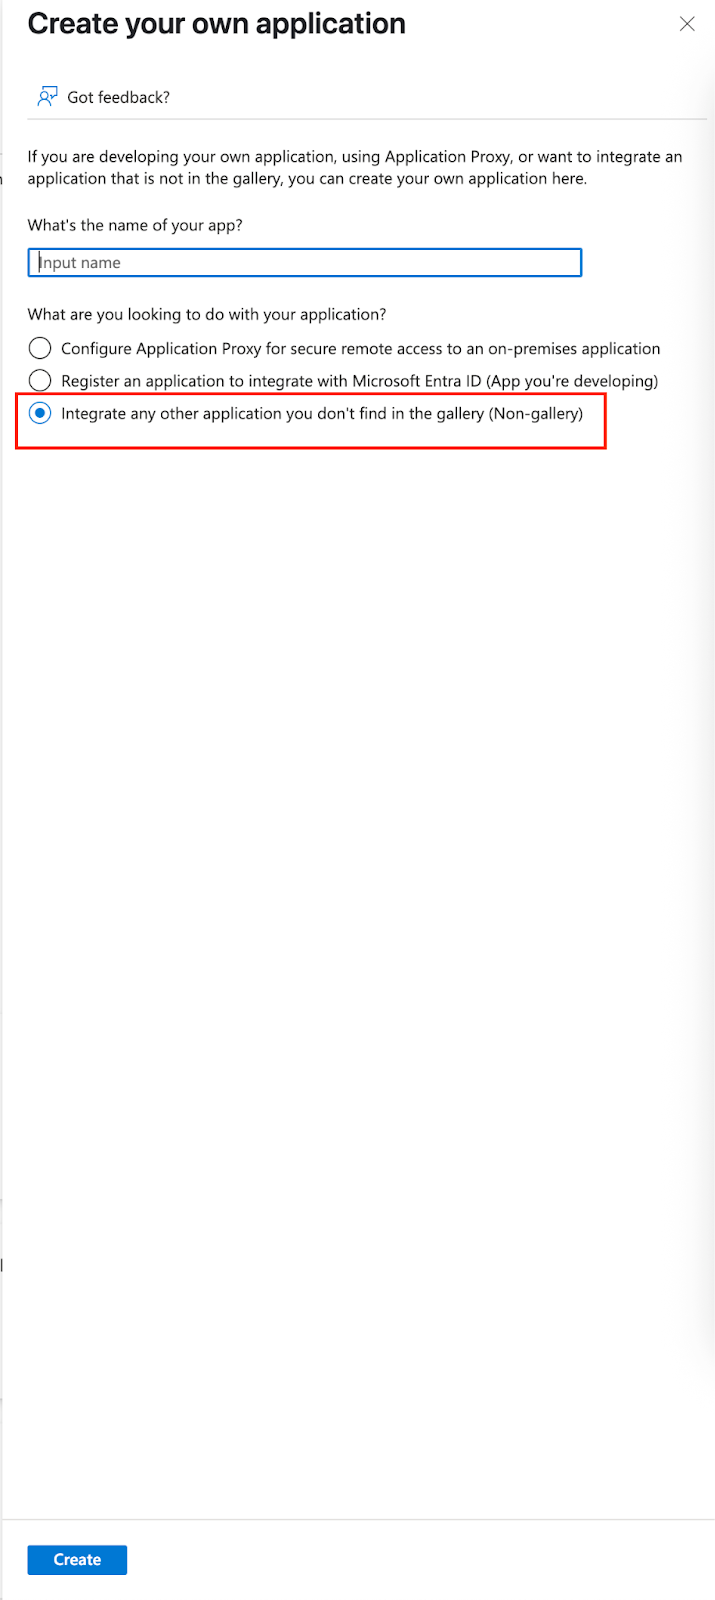
- Select Create your own application
- Configure the application:
- Name: Enter “Wintro-SCIM” or “Wintro”
- Type: Select “Integrate any other application you don’t find in the gallery (Non-gallery)”
- Click Create
Step 2: Generate SCIM Token in Wintro
Before configuring provisioning in Azure, you need to generate a SCIM token in Wintro:
- Log in to Wintro as an Admin
- Navigate to Settings > Organization tab
- Scroll to the User Provisioning (SCIM) section
- Click Generate Token
- Copy and securely save this token - you won’t be able to see it again
- Keep this browser tab open while you configure Azure
Note: If you don’t see the SCIM section or see “Enterprise feature” with a “Contact Sales” button, your current plan doesn’t include SCIM. Please contact our sales team to upgrade to a plan that includes this functionality.
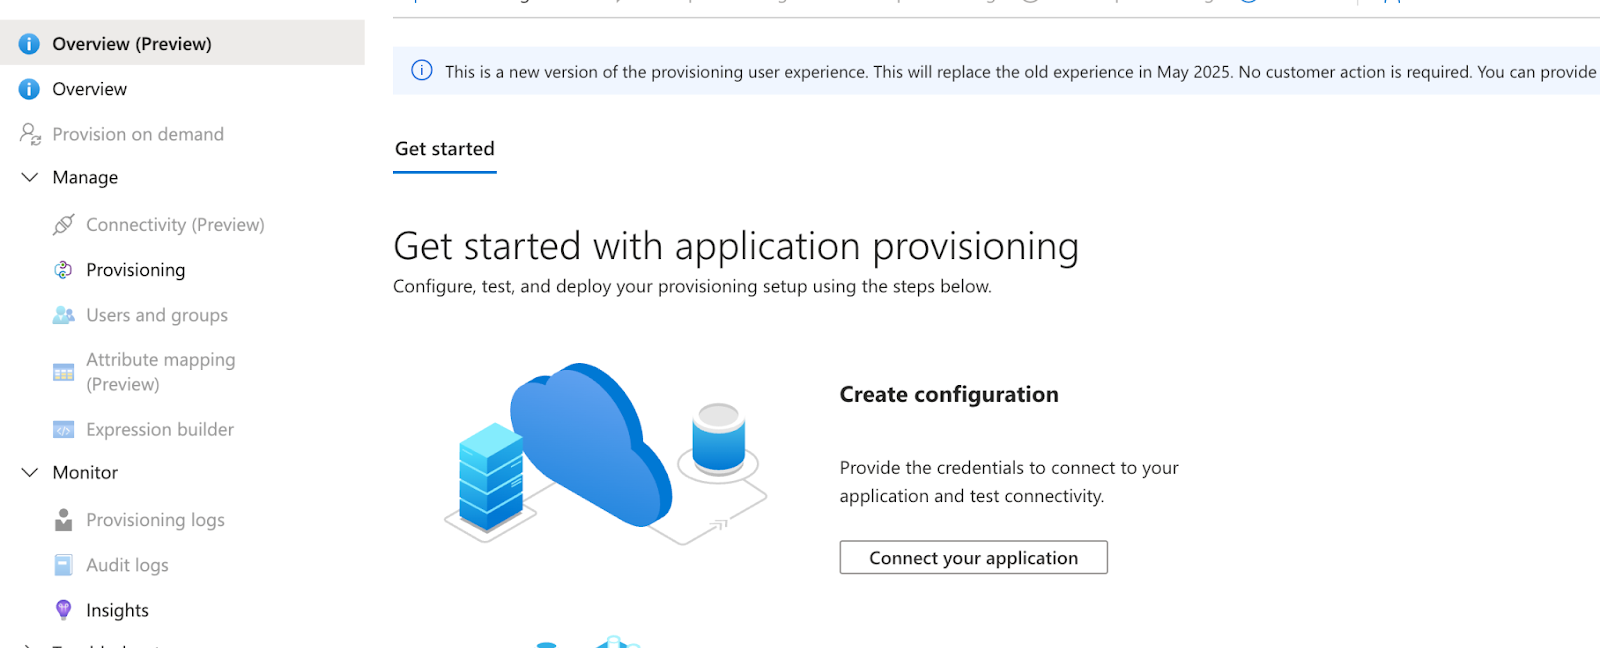
Step 3: Configure Provisioning in Microsoft Entra ID
- In your Wintro enterprise application, navigate to Provisioning in the sidebar
- Click Get started
- Under Provisioning Mode, select Automatic
- Expand the Admin Credentials section and enter:
- Authentication method: Select Bearer authentication
- Tenant URL:
https://www.wintro.app/api/scim/v2 - Secret Token: Paste the token generated from Wintro
- Click Test Connection
- Wait for the success message: “The supplied credentials are authorized to enable provisioning”
- Click Save

Troubleshooting Connection Issues
If the connection test fails:
- Verify the Tenant URL is exactly:
https://www.wintro.app/api/scim/v2 - Ensure you copied the entire token from Wintro
- Check that the token hasn’t expired (tokens are valid for 1 year)
- Generate a new token in Wintro if needed
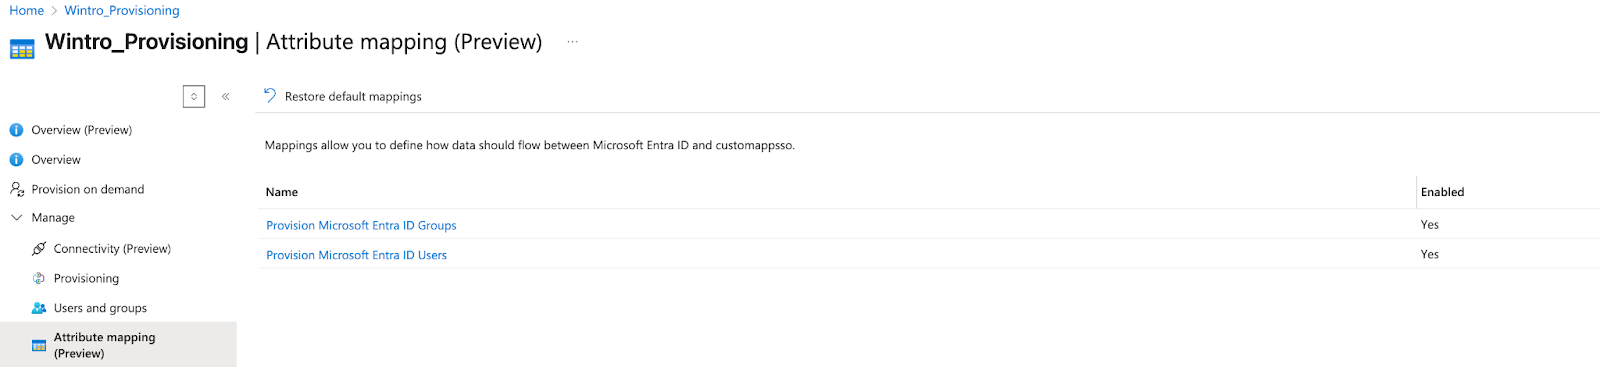
Step 4: Configure Attribute Mappings
Microsoft Entra ID needs to know how to map user attributes to Wintro’s expected format.
- In the Provisioning section, click on Provisioning again to see the full configuration
- Under Mappings, click Provision Microsoft Entra ID Users
- Ensure the following attributes are mapped:
| Microsoft Entra ID Attribute | Wintro Attribute | Required |
|---|---|---|
| userPrincipalName | userName | Yes |
| emails[type eq “work”].value | Yes | |
| givenName | name.givenName | Yes |
| surname | name.familyName | Yes |
| displayName | displayName | Yes |
| Switch([IsSoftDeleted]…) | active | Yes |
Configure the Active Status Expression
The “active” attribute requires a special expression to handle account states properly:
- Find the active attribute mapping
- Click on it to edit
- Set Mapping type to Expression
- In the Expression field, enter:
IIF([IsSoftDeleted]="True", "False", IIF([accountEnabled]="False", "False", "True")) - Click OK to save

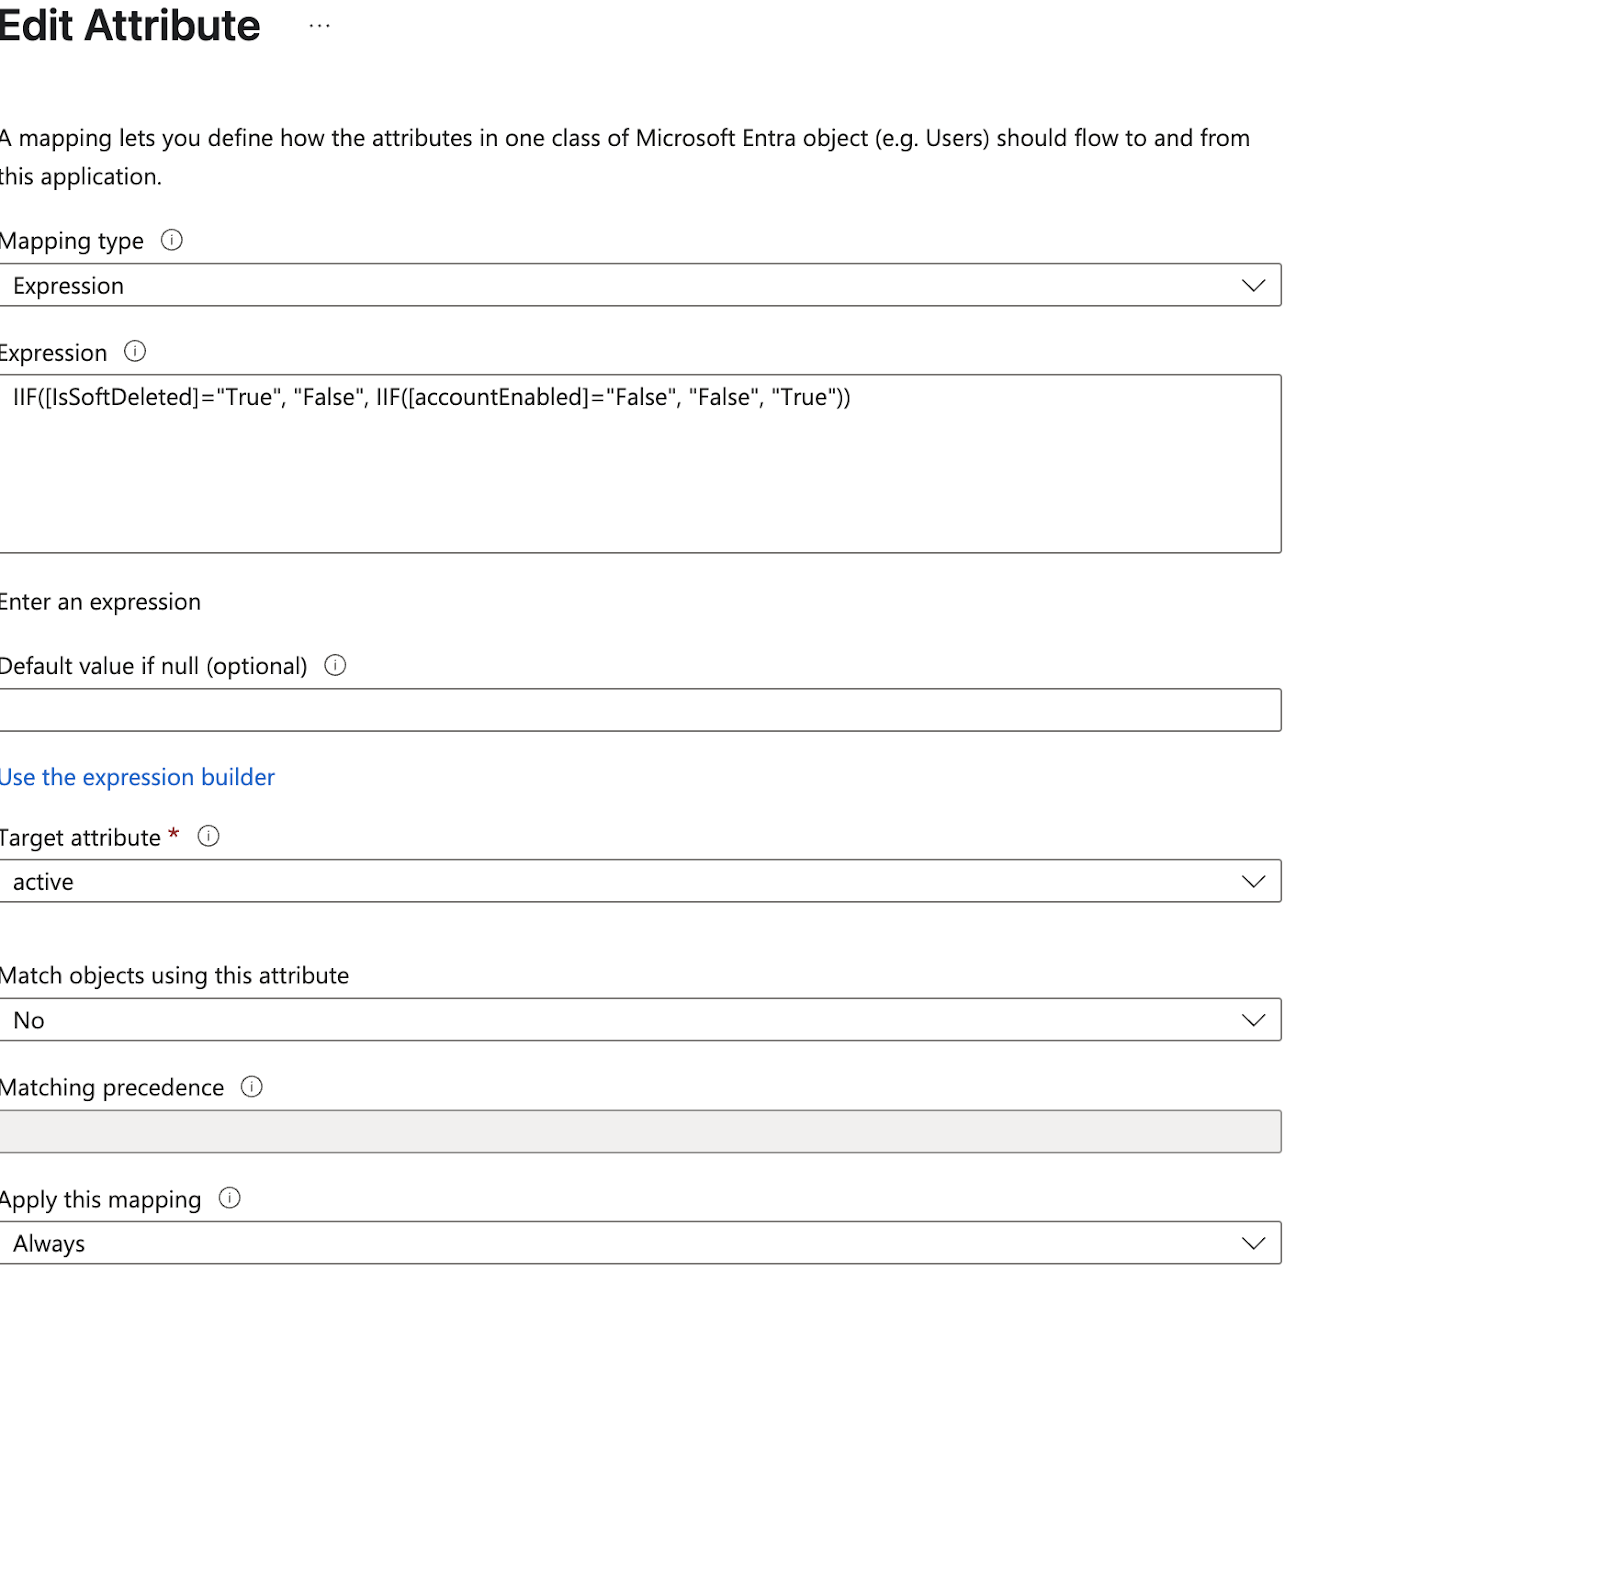
This expression ensures:
- Soft-deleted users in Entra ID are marked as inactive in Wintro
- Disabled accounts in Entra ID are marked as inactive in Wintro
- All other users are marked as active
Optional: Sync Departments
If your organization uses departments in Entra ID, you can sync them to Wintro. Department values typically flow into Entra automatically from your HR system (Workday, SAP SuccessFactors, BambooHR) or from on-premises Active Directory via AD Connect.
To enable department sync, add one additional attribute mapping:
- In the attribute mappings list, click Add New Mapping
- Configure the mapping:
- Mapping type: Direct
- Source attribute:
department - Target attribute:
urn:ietf:params:scim:schemas:extension:enterprise:2.0:User:department - Match objects using this attribute: No
- Apply this mapping: Always
- Click OK, then Save
Wintro will automatically create departments as they arrive and assign users to them. You can verify the mapping works by using Provision on demand (under Provisioning) to test a single user that has a department value before running a full sync.
Step 5: Assign Users and Groups for Provisioning
- Navigate to Users and groups in the application sidebar
- Click + Add user/group
- Select users individually or assign entire groups:
- For individual users: Click None Selected under Users, search and select users
- For groups: Click None Selected under Groups, search and select the groups you want to provision
- Click Select
- Click Assign
Tip: Using groups is recommended for easier management. All members of assigned groups will be automatically provisioned to Wintro. Note that only user data is synced - groups themselves are not created in Wintro, they are simply used to determine which users to provision.
Best practice: Create a dynamic security group in Microsoft Entra ID with rules that automatically include users who should have access to Wintro (e.g., based on department or job title). This way, new employees matching the criteria are automatically provisioned without requiring manual intervention from Microsoft admins.

User Requirements
Before assigning users, verify they have all required fields in Microsoft Entra ID:
- Email address (mail attribute)
- First name (givenName)
- Last name (surname)
- Display name (displayName)
Users missing any of these fields will fail to provision.
Step 6: Configure Provisioning Settings
- Return to the Provisioning page
- Click Edit provisioning
- Expand the Settings section
- Configure the following:
- Scope: “Sync only assigned users and groups”
- Provisioning Status: Leave as “Off” for now
- Email Notification: Enter your email for error notifications
- Prevent accidental deletion: Enable and set threshold (e.g., 500)
Step 7: Start Automatic Provisioning
- On the Provisioning overview page, click Start provisioning
- The initial sync will begin immediately
- Subsequent syncs occur every 40 minutes
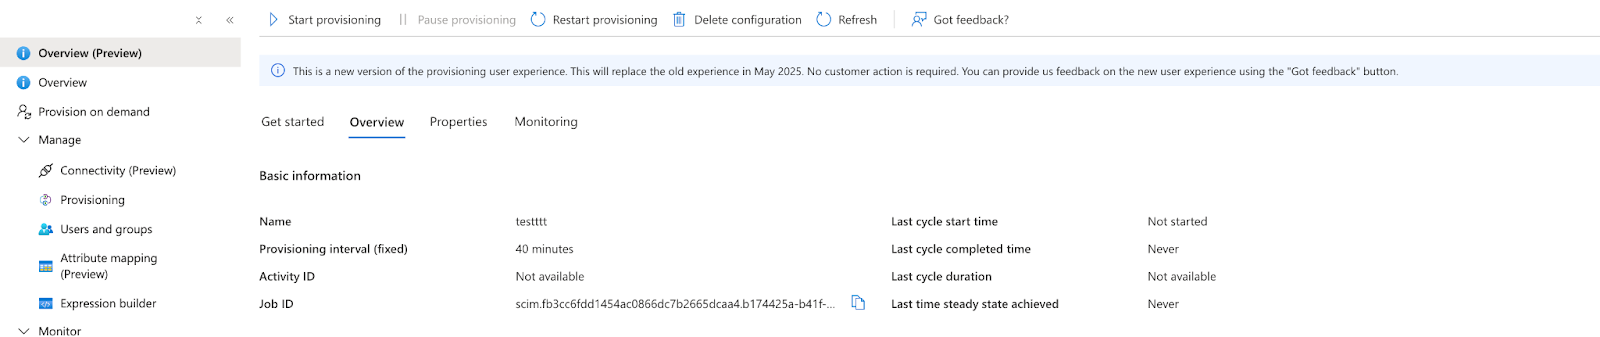
Monitoring Provisioning
View Provisioning Logs
- In the Provisioning section, click Provisioning logs
- Here you can see:
- Successfully provisioned users
- Failed provisioning attempts with error details
- Update operations
- Deactivation events
Common Log Entries
- Create: New user created in Wintro
- Update: Existing user information updated
- Disable: User marked as inactive (account disabled or deleted in Entra ID)
- Skip: User already exists and no changes needed
How Provisioning Works
Initial Sync
- All assigned users are evaluated
- New users are created in Wintro
- Existing users (matched by email) are updated with Entra ID data
- Takes up to 40 minutes for initial sync
Incremental Syncs
- Run every 40 minutes automatically
- Only process changed users
- Updates include:
- Name changes
- Email updates
- Department changes
- Account status (active/inactive)
User Matching
- Users are matched between systems using email address
- Prevents duplicate accounts
- Existing Wintro users get updated with Entra ID data
Troubleshooting
Users Not Provisioning
Check User Assignment
- Verify users or groups are assigned to the application
- If using groups, confirm the user is a member of an assigned group
Verify Required Fields
- Check users have email, first name, last name, and display name in Entra ID
- Review provisioning logs for specific field errors
Token Issues
- Generate a new SCIM token in Wintro Settings > Organization if the current one expired
- Update the token in Azure provisioning settings
Provisioning Delays
- Initial sync can take up to 40 minutes
- Incremental syncs run every 40 minutes
- Check provisioning logs for processing status
- Large user volumes may take longer
Users Not Deactivating
- Verify the active attribute expression is configured correctly
- Check that account is actually disabled in Entra ID
- Allow 40 minutes for sync to occur
Duplicate Users
This shouldn’t occur as matching is done by email. If you see duplicates:
- Check if users have different email addresses in each system
- Contact Wintro support for manual consolidation
Best Practices
Before Going Live
- Test with a small group - Start with 5-10 test users
- Verify all attributes - Ensure names and emails sync correctly
- Check existing users - Confirm updates work for existing Wintro users
- Document your setup - Keep notes on token generation date and configuration
Ongoing Management
- Monitor provisioning logs weekly for errors
- Review inactive users monthly
- Regenerate SCIM token annually in Wintro Settings > Organization (before expiration)
- Audit user assignments quarterly
Security Considerations
- Protect SCIM tokens - Treat as passwords, never share in plain text
- Limit admin access - Only users with Admin role in Wintro can manage SCIM settings
- Enable notifications - Get alerts for provisioning errors in Azure
- Regular audits - Review who has Admin access in Wintro and provisioning configuration in Azure
Next Steps
After successfully configuring SCIM:
- Configure SSO if not already done
- Set up Microsoft Teams integration
- Train HR team on the automated provisioning process
- Document your organization’s onboarding/offboarding procedures
With SCIM configured, your user management is now automated. New employees will automatically get Wintro access, and departing employees will be deactivated, ensuring your Wintro user base stays synchronized with your Microsoft Entra ID directory.

