
Microsoft Teams App
Step-by-step guide for installing and configuring the Wintro app for Microsoft Teams
This guide provides step-by-step instructions for installing and configuring the Wintro app for Microsoft Teams. Successful integration will enable seamless communication and user management between Wintro and your Teams environment.
What the Wintro Teams App Does
The Wintro Teams app is a notification-only app that delivers Wintro updates directly to employees’ Teams chats. You can view the app in the Teams App Store.
It enables:
- Receiving referral notifications and updates in Teams
- Quick access to Wintro through adaptive card actions
- Automatic conversation setup when users install the app
The app operates exclusively in personal chat scope - it does not access team channels, group chats, or meetings content.
Users who prefer to receive notifications via email instead can simply uninstall the app from their Teams (right-click Uninstall). Their notification preference will automatically be reset to email.
Prerequisites
Before you begin, ensure the following:
- Microsoft Teams Admin Access: You need Administrator rights in the Microsoft Teams Admin Center to approve the Wintro app and grant organization permissions.
- A recruiter admin account in Wintro.
Setup via Onboarding Wizard
When a recruiter admin goes through the Wintro onboarding flow, the notifications step includes a guided Teams setup wizard. The wizard walks through the following steps:
Step 1: Choose Notification Channel
Select Microsoft Teams as your preferred notification channel (other options are Email and Slack).
Step 2: Connect Wintro to Microsoft Teams
You have two options for connecting:
Option A: Automatic Setup (Recommended)
This is the quickest path. A Microsoft 365 admin grants organization-level permissions via OAuth consent:
- Click “Grant Permissions” in the Wintro onboarding wizard
- You’ll be redirected to Microsoft’s consent page
- Sign in with a Global Administrator or Application Administrator account
- Review and accept the permissions
- You’ll be redirected back to Wintro
Once granted, Wintro automatically connects employees when the Teams app is installed for your organization, no individual setup needed per employee.
Grant permissions once and Wintro will automatically connect your employees via Teams.
Wintro automatically links employees when the Teams app is installed, no individual setup needed.
Option B: Manual Tenant ID
If you don’t have admin access for the consent flow, you can connect manually:
- Enter your Microsoft Azure AD Tenant ID in the provided field
- To find your Tenant ID: go to the Azure Portal, navigate to Microsoft Entra ID > Overview
- Click Save
- Wintro will sync your Teams users automatically
With this option, each recruiter will need to individually connect Teams from Settings > Notifications.
Provide your Microsoft Tenant ID to connect Wintro to your Teams environment.
Find this in the Azure Portal under Microsoft Entra ID Overview.
After saving, each recruiter will need to individually connect Teams from Settings to enable Teams notifications.
Step 3: Install the Teams App
- Click the “Install Teams App” button, this opens Microsoft Teams in a new tab
- Follow the prompts in Teams to install the Wintro app
- Wintro automatically detects the installation (polls for up to 2 minutes)
- Once detected, you’ll see a success confirmation
If the installation isn’t detected within the timeout, you can retry or skip and complete this step later.
Step 4: Review & Set as Default
- Preview a test notification to verify the connection works
- Optionally send a test notification to yourself
- Click “Set as Default & Continue” to make Teams your default notification channel
Microsoft Teams Admin Center Configuration
To make the Wintro app available to your organization, a Teams admin needs to approve and optionally deploy it.
1. Find and Approve the Wintro App
- Go to the Microsoft Teams Admin Center
- Navigate to “Teams apps” > “Manage apps”
- Search for “Wintro” in the search bar
- Click on the Wintro app to open its details
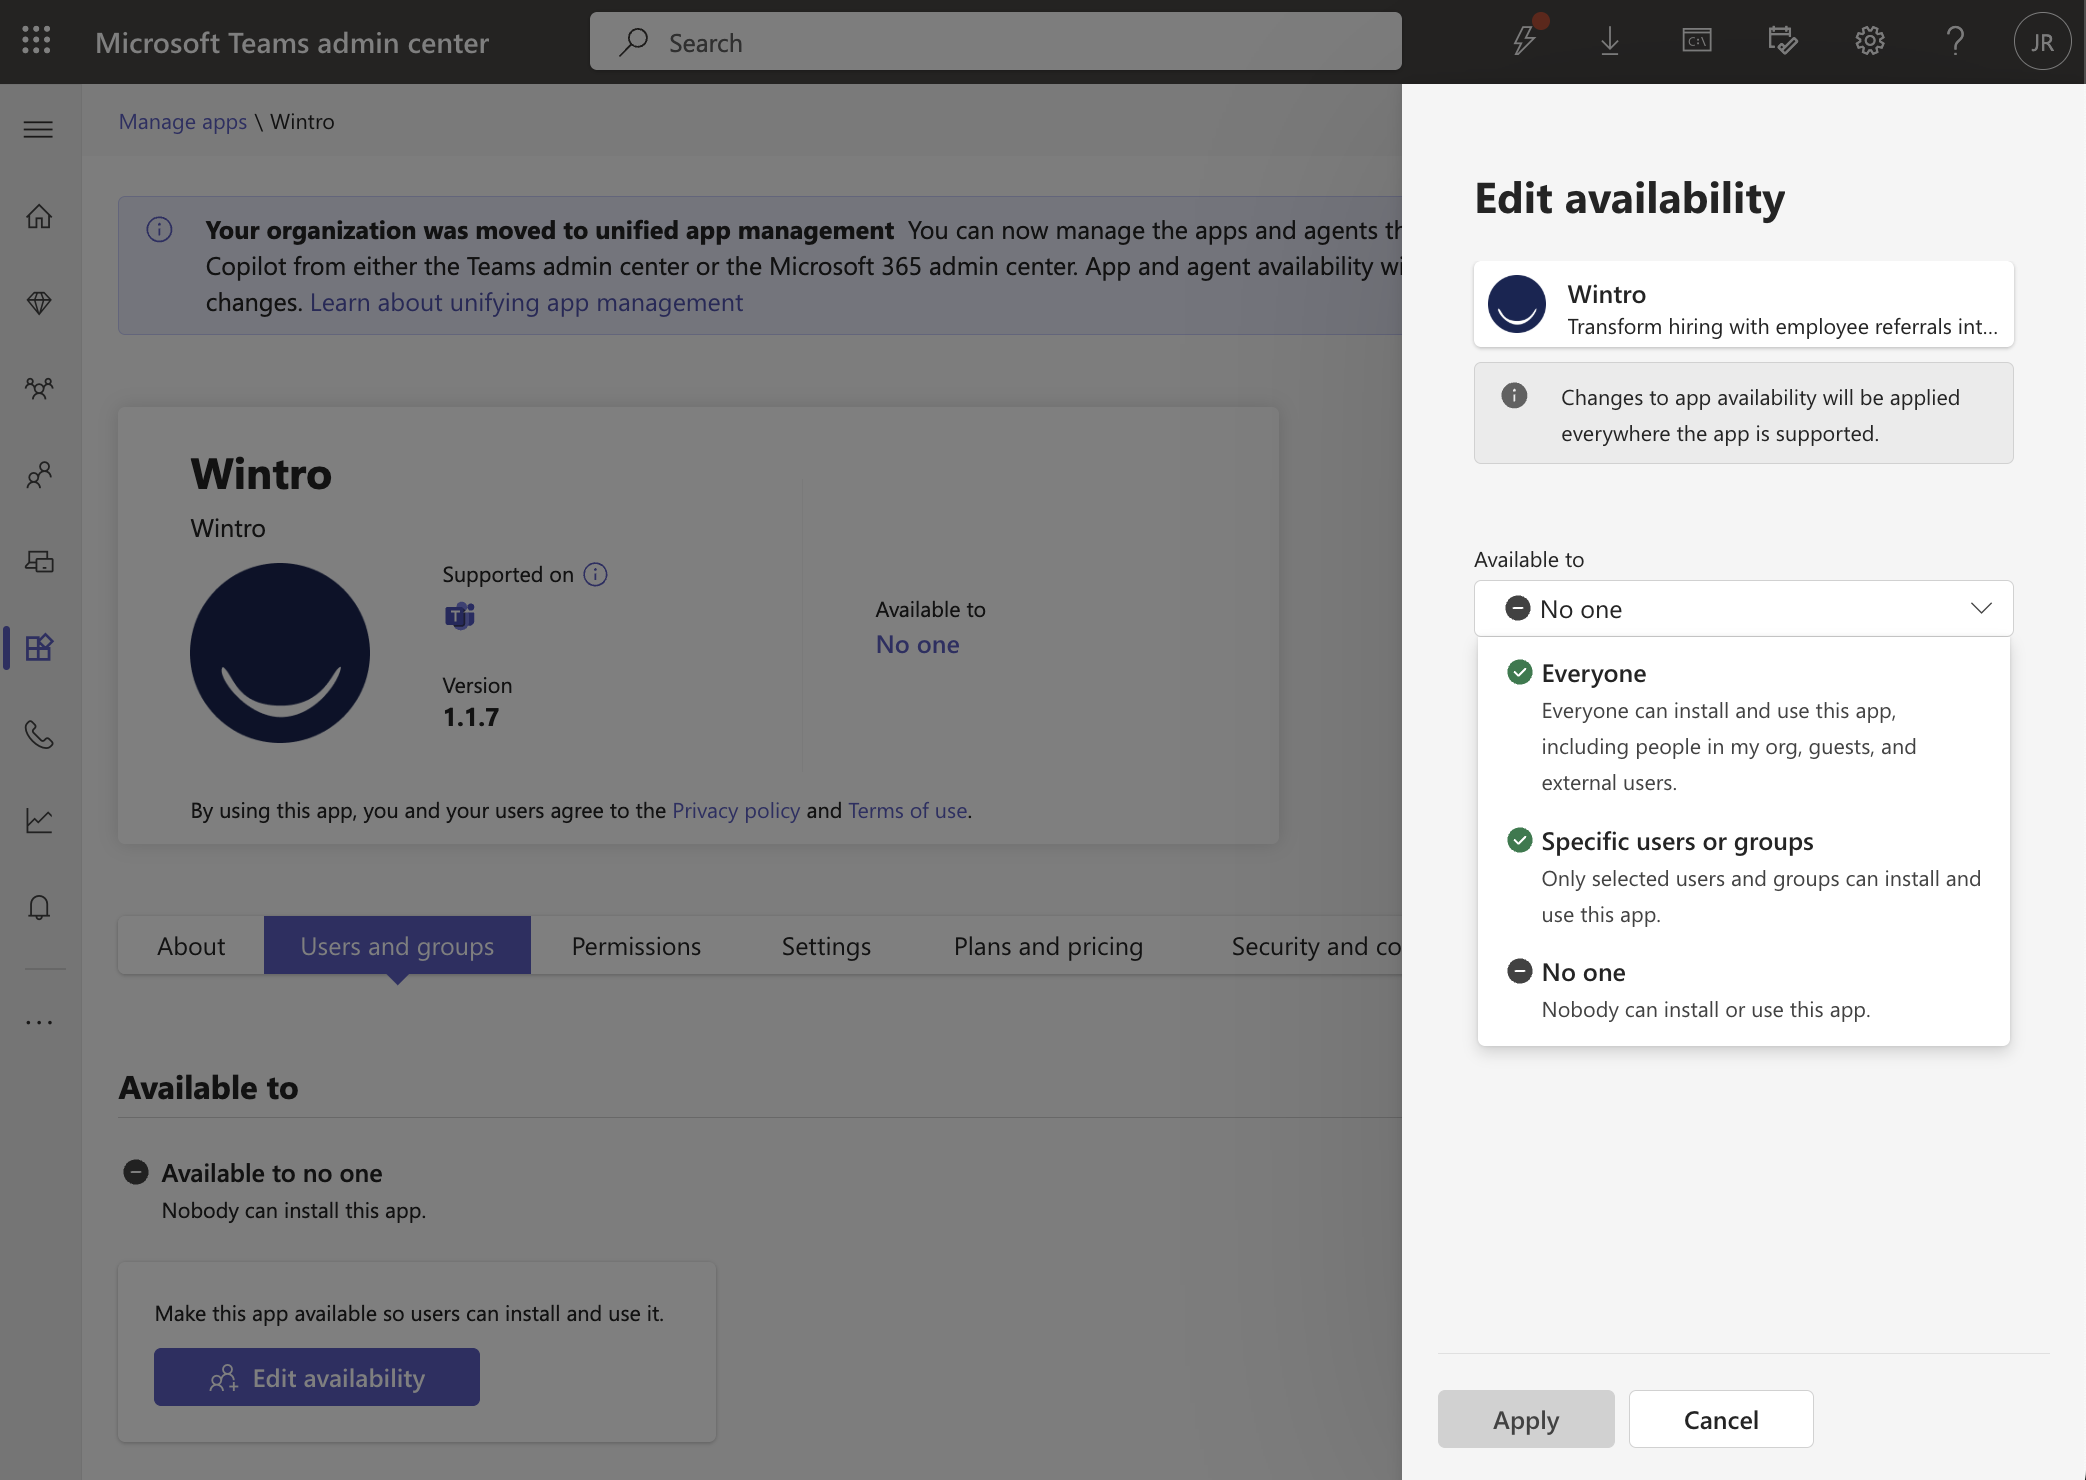
- Go to the “Users and groups” tab
- Click “Edit availability”
- Choose who can install the app:
- Everyone: Select this if all employees in your organization use Wintro
- Specific users or groups: Select this if only certain users have access to Wintro (e.g., use the same security group you configured for SSO/SCIM provisioning)
- Click “Apply” to save your changes
2. Configure Teams App Setup Policies (Optional)
You can optionally auto-deploy the Wintro app to users via setup policies, so they don’t need to install it manually.
Option A: Organization-wide deployment
- In the Teams Admin Center, navigate to “Teams apps” and then select “Setup policies”
- Choose the “Global (Org-wide default)” policy
- Under “Installed apps,” click “Add apps” to ensure “Wintro” is included
- Optional: Pin the App: Under “Pinned apps,” add Wintro to make it easily accessible in the Teams sidebar
Option B: Deploy to a specific group (recommended for pilots or phased rollouts)
- In the Teams Admin Center, navigate to “Teams apps” > “Setup policies”
- Click “Add” to create a new custom policy (e.g., “Wintro Users Policy”)
- Under “Installed apps,” add “Wintro”
- Click “Save”
- Assign the policy via “Assign users” or “Group policy assignment” (e.g., using the same security group used for SSO/SCIM provisioning)
Alternative: Settings Page Configuration
If you’ve already completed onboarding or need to reconfigure Teams later, you can also set up Teams from:
- Log in to Wintro with a recruiter admin account
- Navigate to Settings > Notifications
- Select Teams as your notification channel
- Follow the same connection options (automatic or manual tenant ID) as described above
Permissions & Capabilities
The Wintro Teams app requests minimal permissions following the principle of least privilege. All permissions are declared in the app manifest and can be reviewed before installation.
App Identification
| Property | Value |
|---|---|
| App ID | 410d9cc1-22d8-4ca4-947d-1b686ba56199 |
| Bot ID | d70347e7-f4d1-4323-93a4-760a6a6c1d91 |
| Microsoft Partner Network ID | 6971263 |
App Capabilities
| Capability | Value | Why |
|---|---|---|
| Scope | Personal only | The app only operates in 1:1 chats with users, not in team channels or group chats. |
| Notification-only | Yes | The app is designed to send notifications, not to have complex conversations. |
| Calling support | No | The app cannot initiate or receive calls. |
| Video support | No | The app cannot access video features. |
| File access | No | The app cannot send or receive files. |
Resource-Specific Permissions
| Permission | Type | Why We Need It |
|---|---|---|
TeamsActivity.Send.User | Application | To send activity feed notifications to users when there are Wintro updates. |
ChannelMember.Read.Group | Application | To identify users in your organization for matching with Wintro accounts. |
Device Permissions
| Permission | Why We Need It |
|---|---|
notifications | To deliver Teams notifications when Wintro sends updates. |
openExternal | To allow users to open links to the Wintro web app from notification cards. |
What the App Cannot Do
- Cannot read your messages - The app only sends messages, it cannot read your chat history
- Cannot access team channels - Operates only in personal 1:1 chats
- Cannot access files - No file read/write capabilities
- Cannot make calls - No calling or video capabilities
- Cannot access your calendar - No calendar permissions requested
- Cannot access other apps’ data - Isolated to Wintro functionality only
Organization Permissions (Admin Consent)
Admin consent is part of the Automatic Setup option during onboarding (see Step 2 above). When granted, Wintro automatically connects employees, no manual steps per employee.
What This Permission Does
- Employees are connected to Wintro automatically, no individual setup needed
- Nudges are delivered via Teams to any employee in your organization
- New employees are connected as soon as the Teams app is deployed to them
Without this permission, each employee must individually install the Teams app to receive nudges.
Permission Details
| Permission | Type | Microsoft Name | Why We Need It |
|---|---|---|---|
| Look up users by email | Application | User.Read.All | To find employees’ Teams accounts by their email address for proactive message delivery. This is a read-only permission, Wintro cannot modify any user data. |
Requirements
- You must be a Global Administrator or Application Administrator in Microsoft Entra ID
- The permission applies to your entire tenant, all Wintro users in your organization benefit
Revoking Permissions
To revoke the admin consent:
- Go to the Microsoft Entra Admin Center
- Navigate to Enterprise Applications
- Search for “Wintro” (App ID:
747294b8-b05f-46cf-80e5-d003a0a6ffb8) - Go to Permissions
- Click Revoke admin consent
Data Handling
What we store:
- Your Teams user ID (to send you notifications)
- Your conversation reference (to enable proactive messaging)
- Your tenant ID (to identify your organization)
Data retention:
- Conversation data is immediately deleted when your Wintro account is deleted
- No message content is stored - we only keep delivery references
Uninstalling the App
If you need to remove the Wintro Teams app from your organization, follow these steps.
Remove from Users via Setup Policies
- In the Teams Admin Center, navigate to “Teams apps” > “Setup policies”
- Select the policy that has Wintro installed (either “Global” or your custom policy)
- Under “Installed apps,” find Wintro and click the “X” to remove it
- Click “Save”
The app will be automatically uninstalled from all users assigned to that policy. Note that policy changes may take a few hours to propagate to all users.
Block or Remove from Your Organization
To prevent the app from being used in your organization:
- Go to the Microsoft Teams Admin Center
- Navigate to “Teams apps” > “Manage apps”
- Search for “Wintro”
- Select the Wintro app
- Change the status to “Blocked” to prevent usage
Individual User Uninstall
Users can also uninstall the app themselves:
- In Microsoft Teams, right-click the Wintro app in the left sidebar (or find it in the Apps section)
- Select “Uninstall”
What Happens to Data After Uninstalling
- On Wintro’s side: Conversation references stored in Wintro become inactive. If you later offboard from Wintro entirely, all Teams-related data (user IDs, conversation references, tenant ID) is permanently deleted along with your Wintro account data.
- On Microsoft’s side: The chat history with the Wintro app remains in the user’s Teams chat history unless they manually delete it. No Wintro data persists in your Microsoft tenant after uninstalling.
Troubleshooting
Not receiving notifications?
- Ensure the Wintro app is installed in your Teams
- Check that your organization’s IT admin has approved the app
- Verify that Teams is set as your notification channel in Wintro settings
App not responding?
- The app is notification-only and responds to limited commands (help, hello, about)
- For full Wintro functionality, use the web application

