
Linking your Carerix account (GraphQL)
How to link your Carerix account to Wintro through the Carerix GraphQL API?
Carerix is retiring its legacy REST API and recommends the GraphQL API for all new integrations. New Wintro customers connect through GraphQL. If your company already has a working Carerix connection in Wintro, nothing changes for you.
Who does what
Connecting takes two accounts, which can belong to one person or to two colleagues:
- In Wintro: a recruiter with the admin role. Only admins see Settings → ATS, where the connection is made. The IT setup link does not offer the Carerix GraphQL connection.
- In Carerix: a user with access to Maintenance → Identity Access. This is normally a Carerix administrator.
The Carerix admin creates a client and hands three values to the Wintro admin, who pastes them into Wintro:
- the OpenID Configuration link
- a Client ID
- a Client secret
The secret gives access to your Carerix data. Share it through a password manager or enter it together, not in a plain email.
Open the connection in Wintro
-
In Wintro, go to Settings → ATS. The Carerix GraphQL card shows Not connected. Click Connect.

-
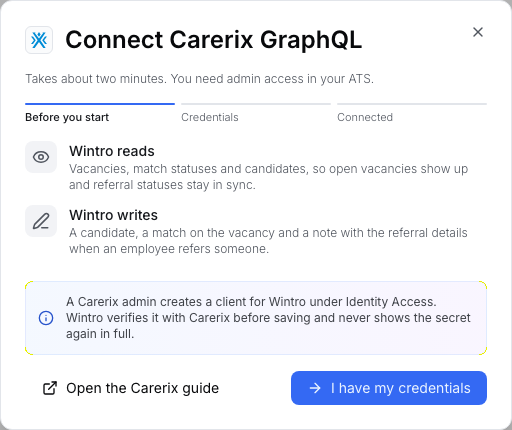
Wintro shows what it reads from and writes to Carerix. Click I have my credentials.
-
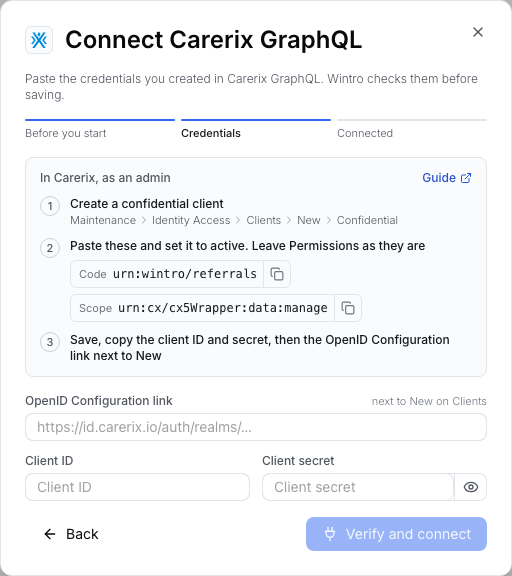
The next step shows the Code and Scope for the Carerix client, each with a copy button, and the three fields to fill in. Keep it open in a separate browser tab while you work in Carerix.
Create the client in Carerix
-
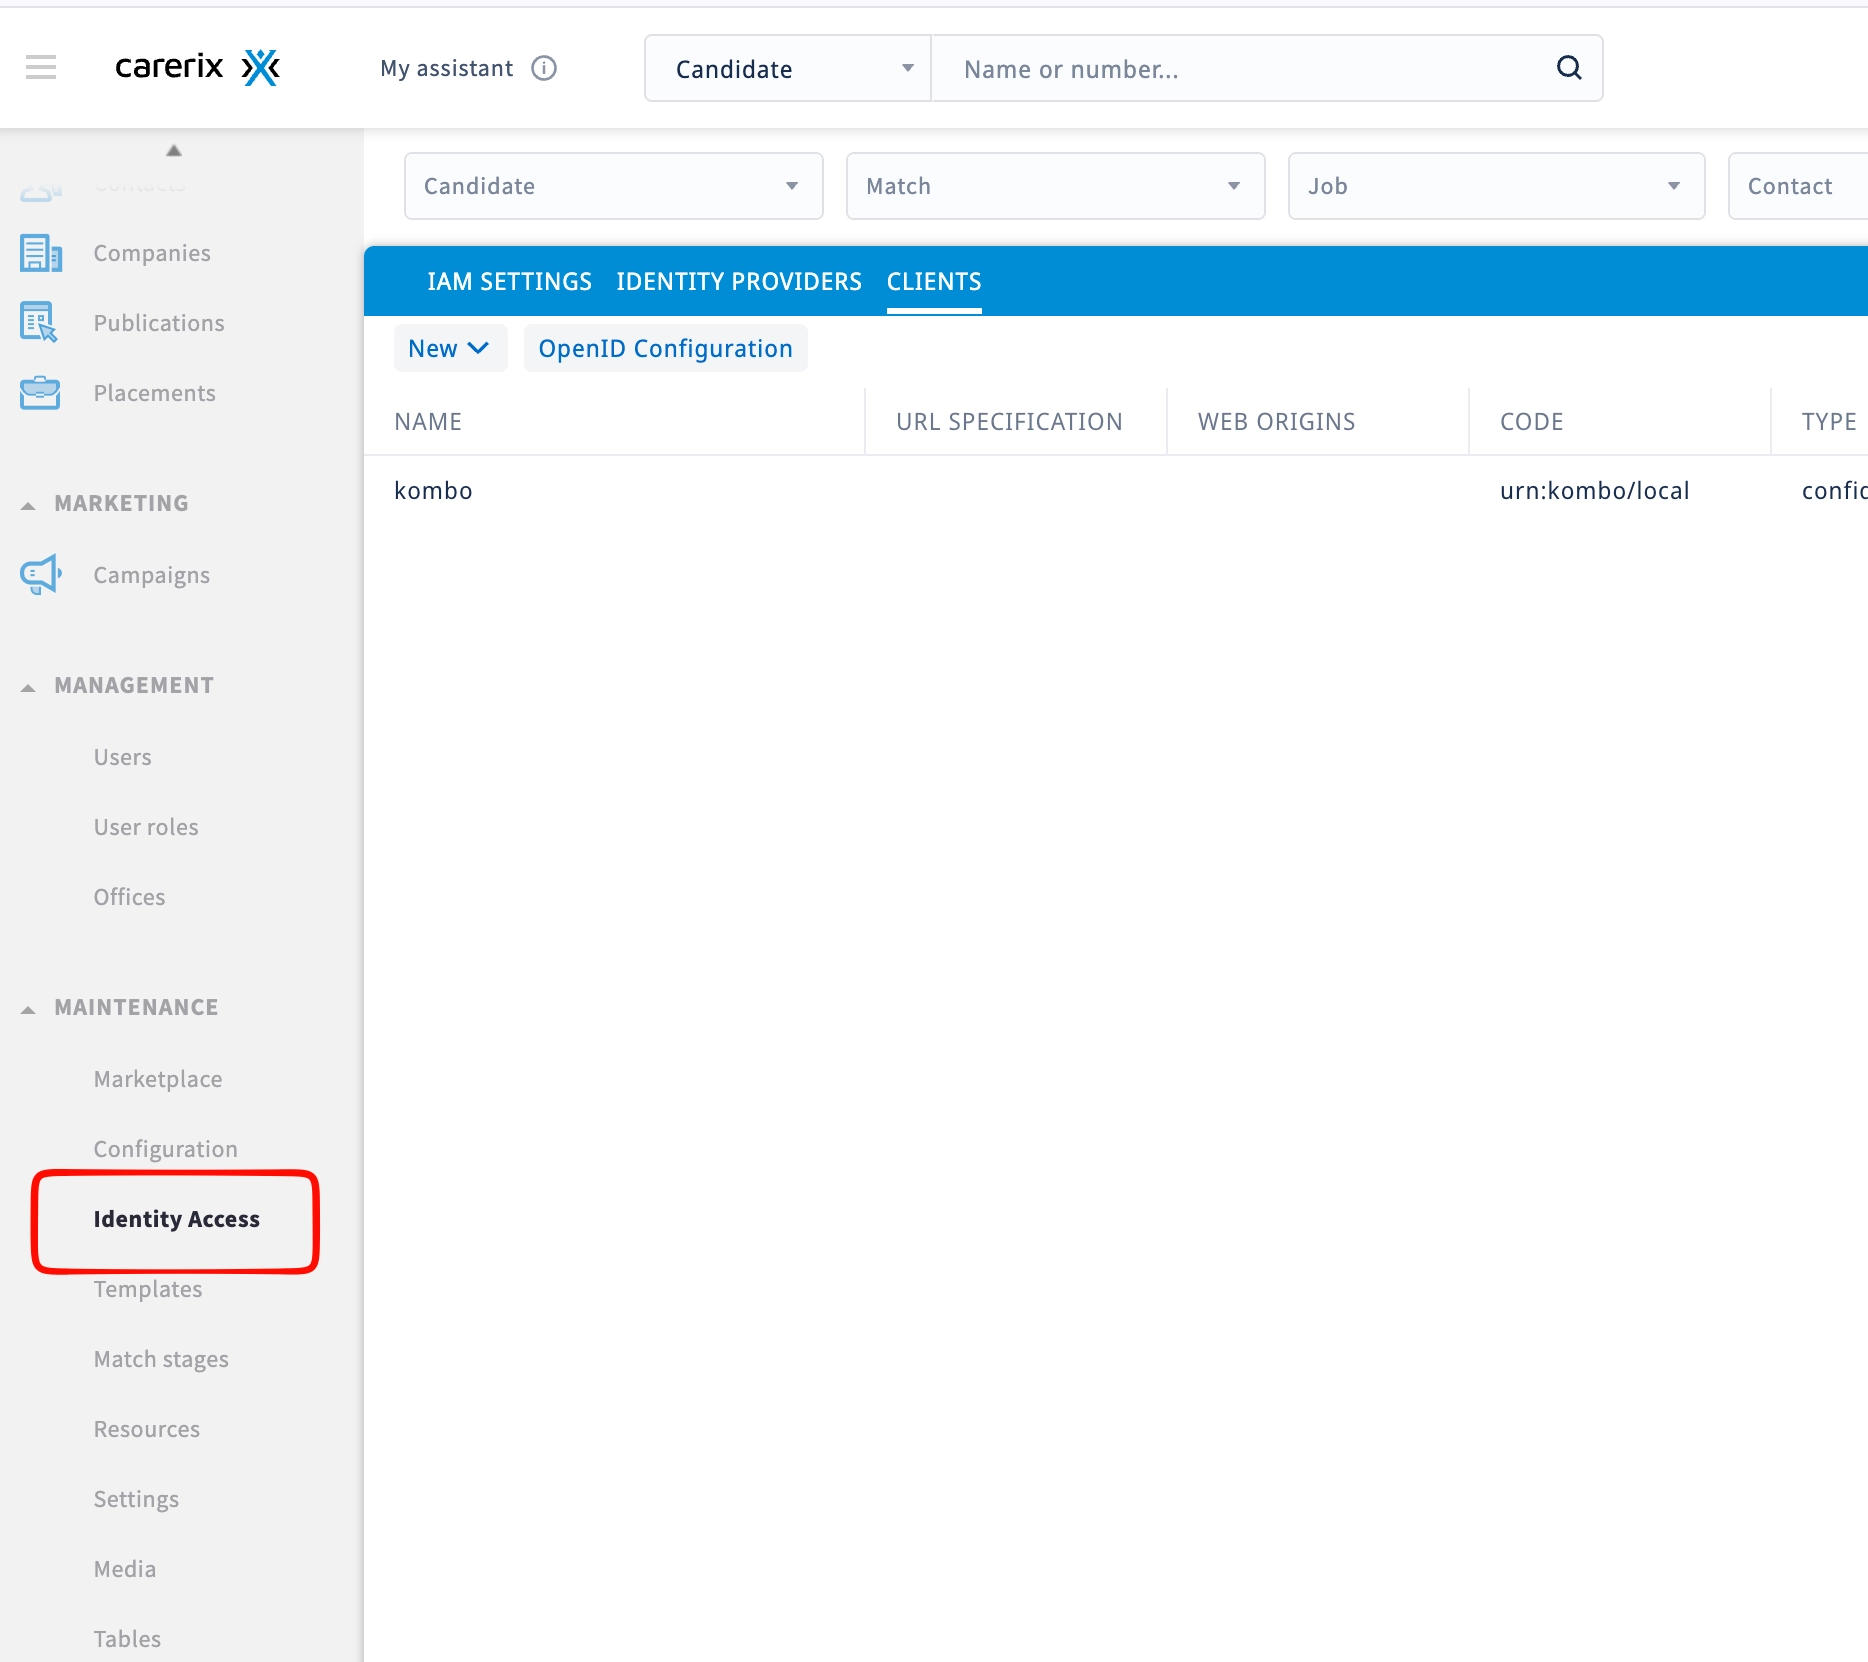
Open Identity Access. In Carerix, go to Maintenance → Identity Access in the left sidebar and open the CLIENTS tab.
-
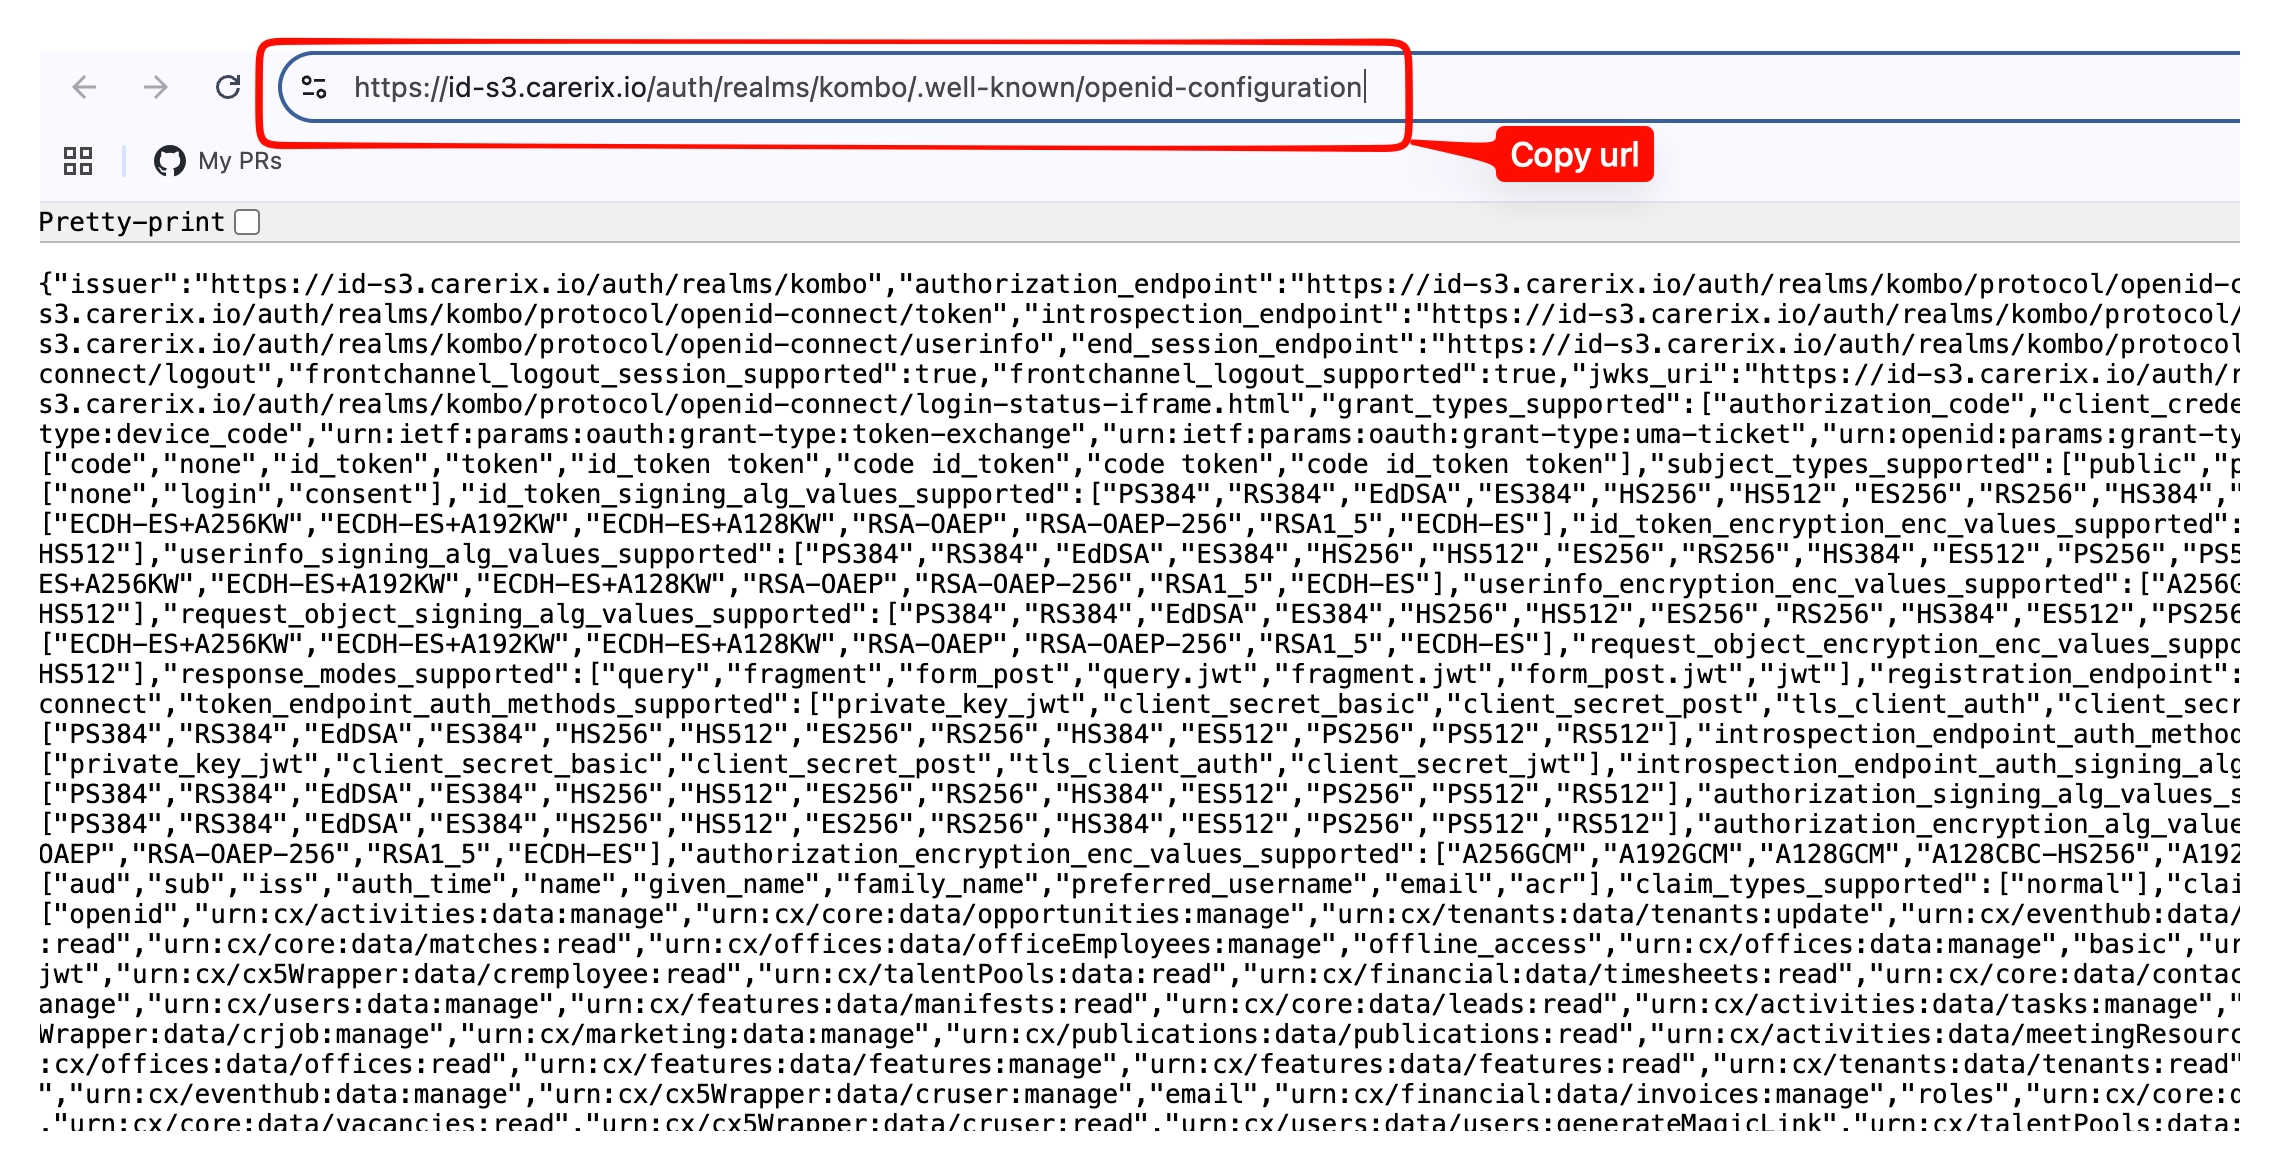
Copy the OpenID Configuration link. On the CLIENTS tab, click OpenID Configuration. Carerix opens the configuration in a new tab, at an address that looks like
https://id-s3.carerix.io/auth/realms/<your-realm>/.well-known/openid-configuration. Copy the full address from the address bar and paste it into the OpenID Configuration link field in Wintro.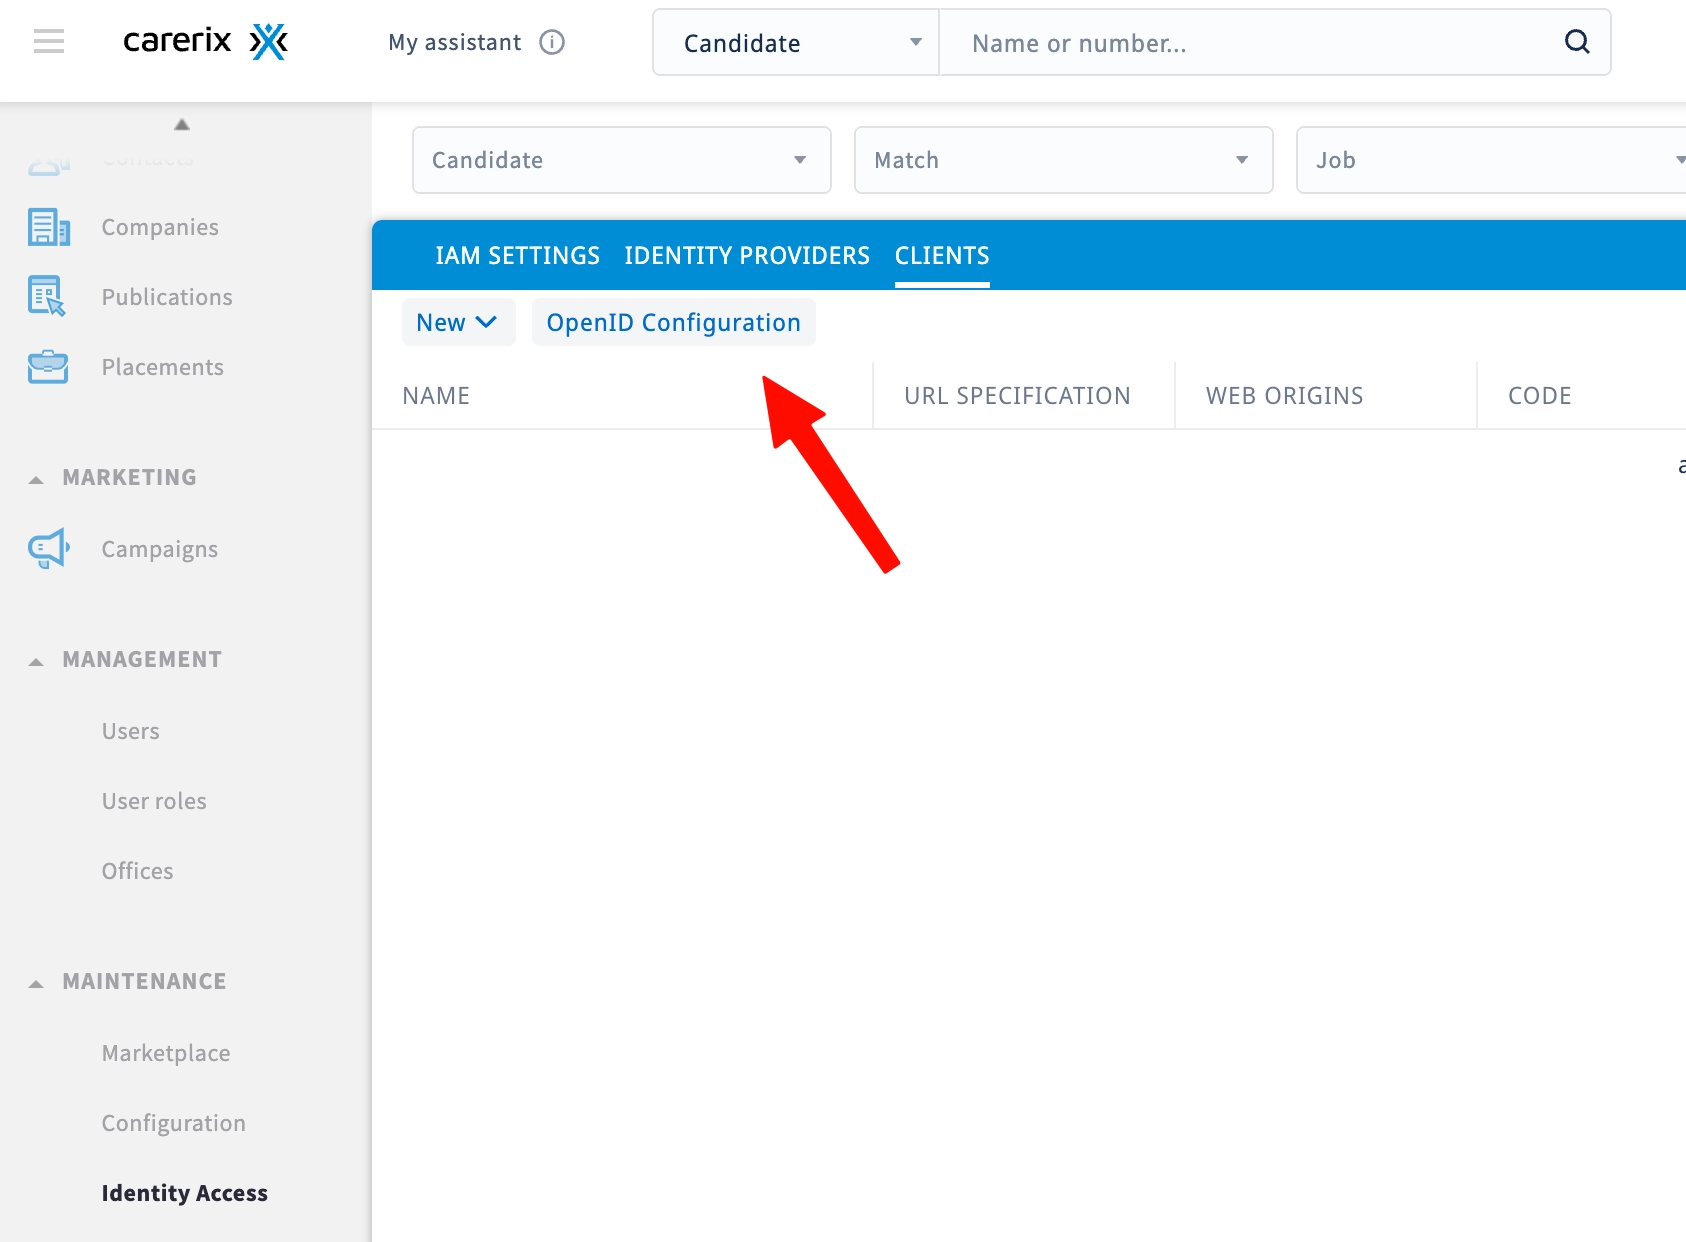
-
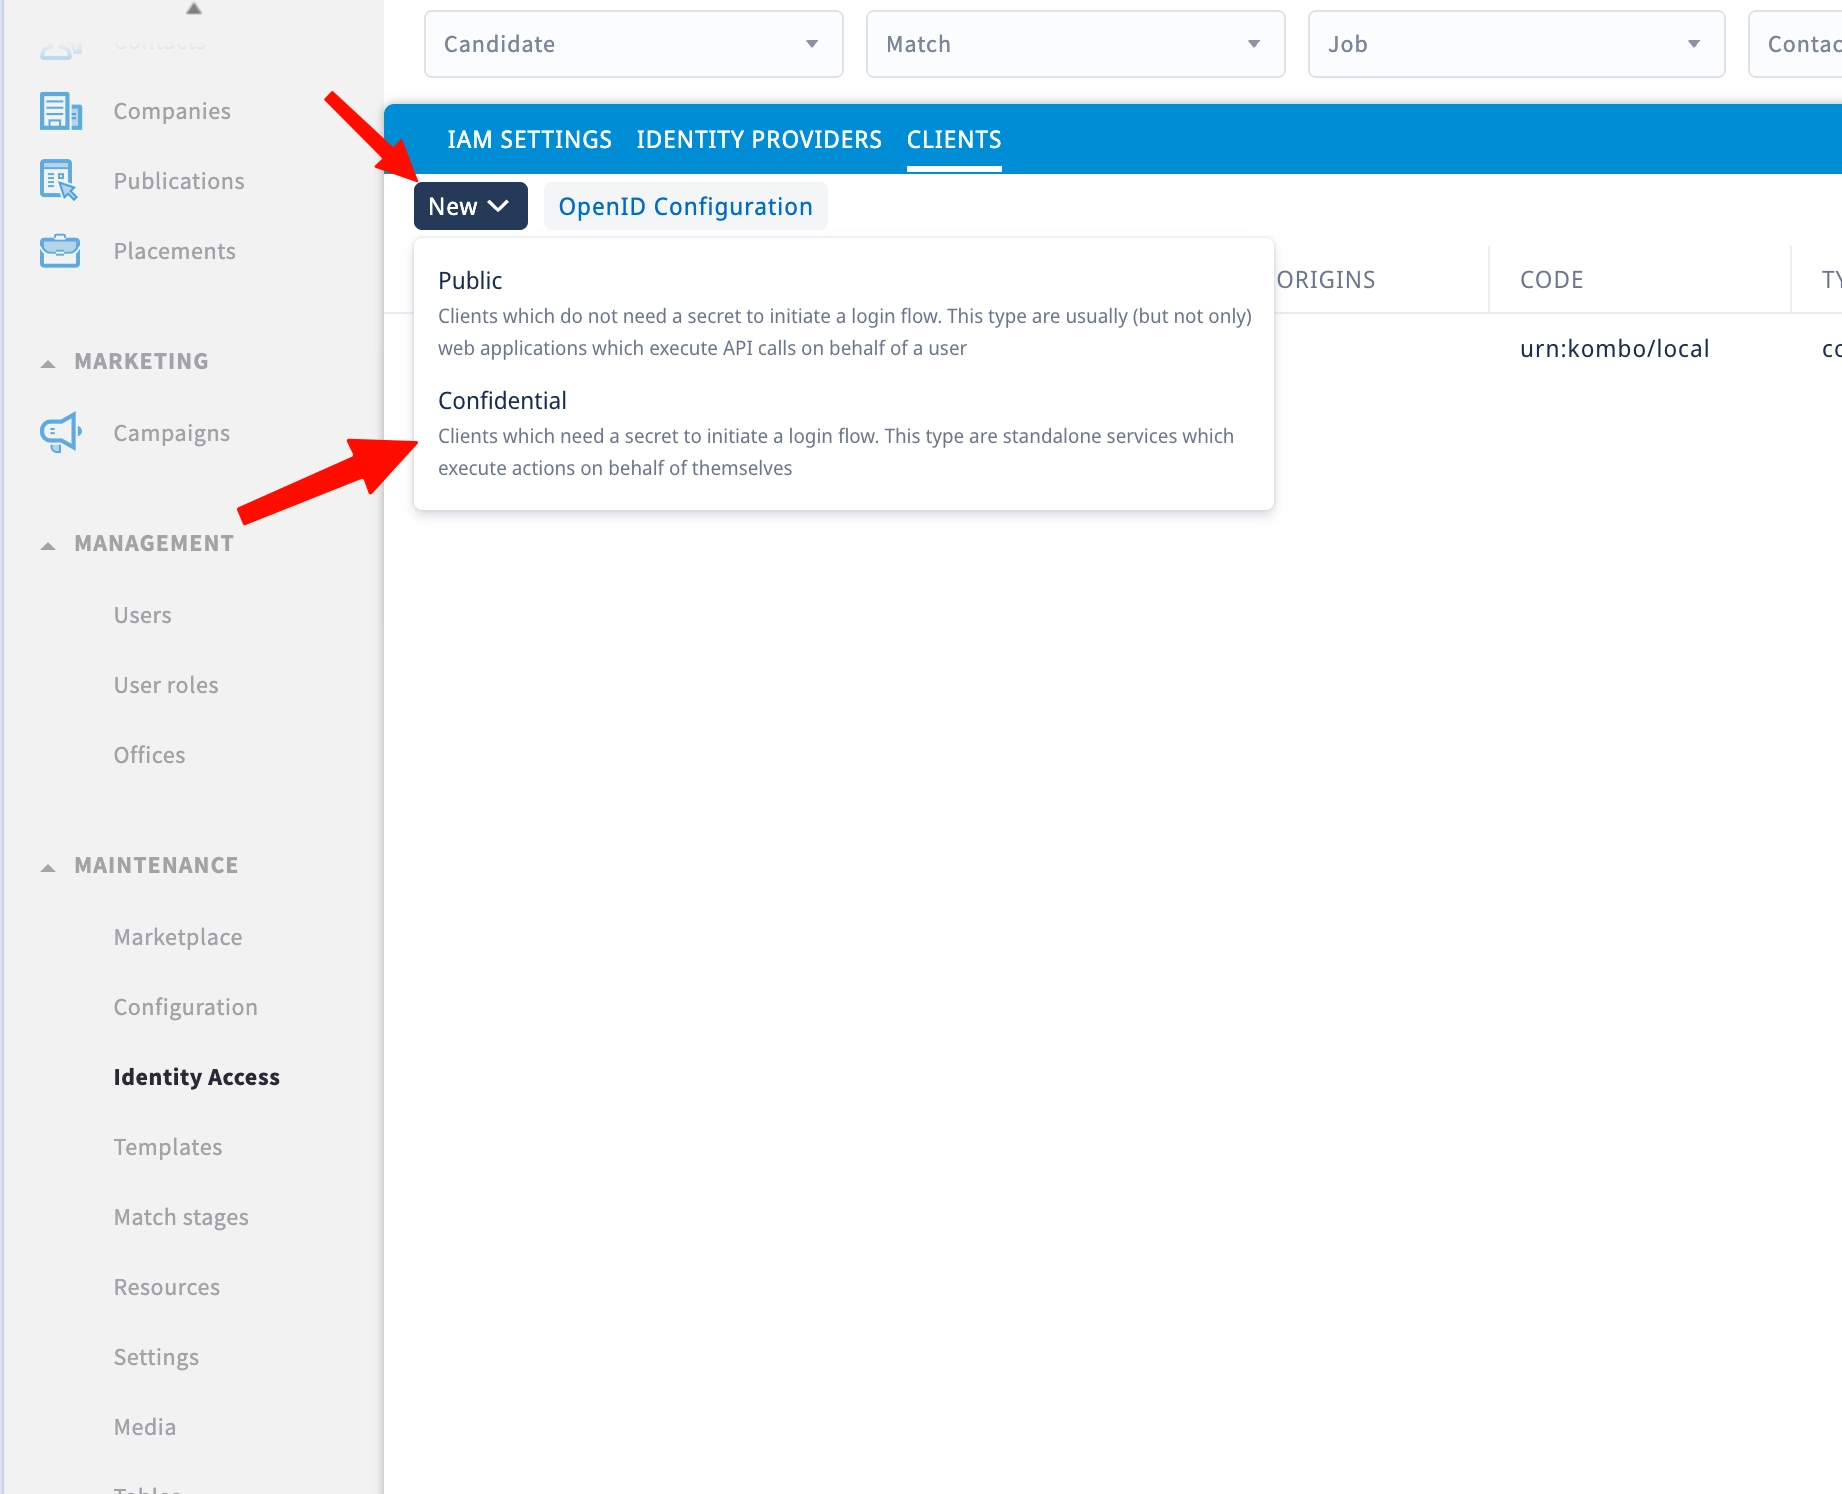
Create a confidential client. Back on the CLIENTS tab, click New and choose Confidential. Pick Confidential, not Public: a confidential client signs in with a secret as a standalone service, which is what the integration needs.
-
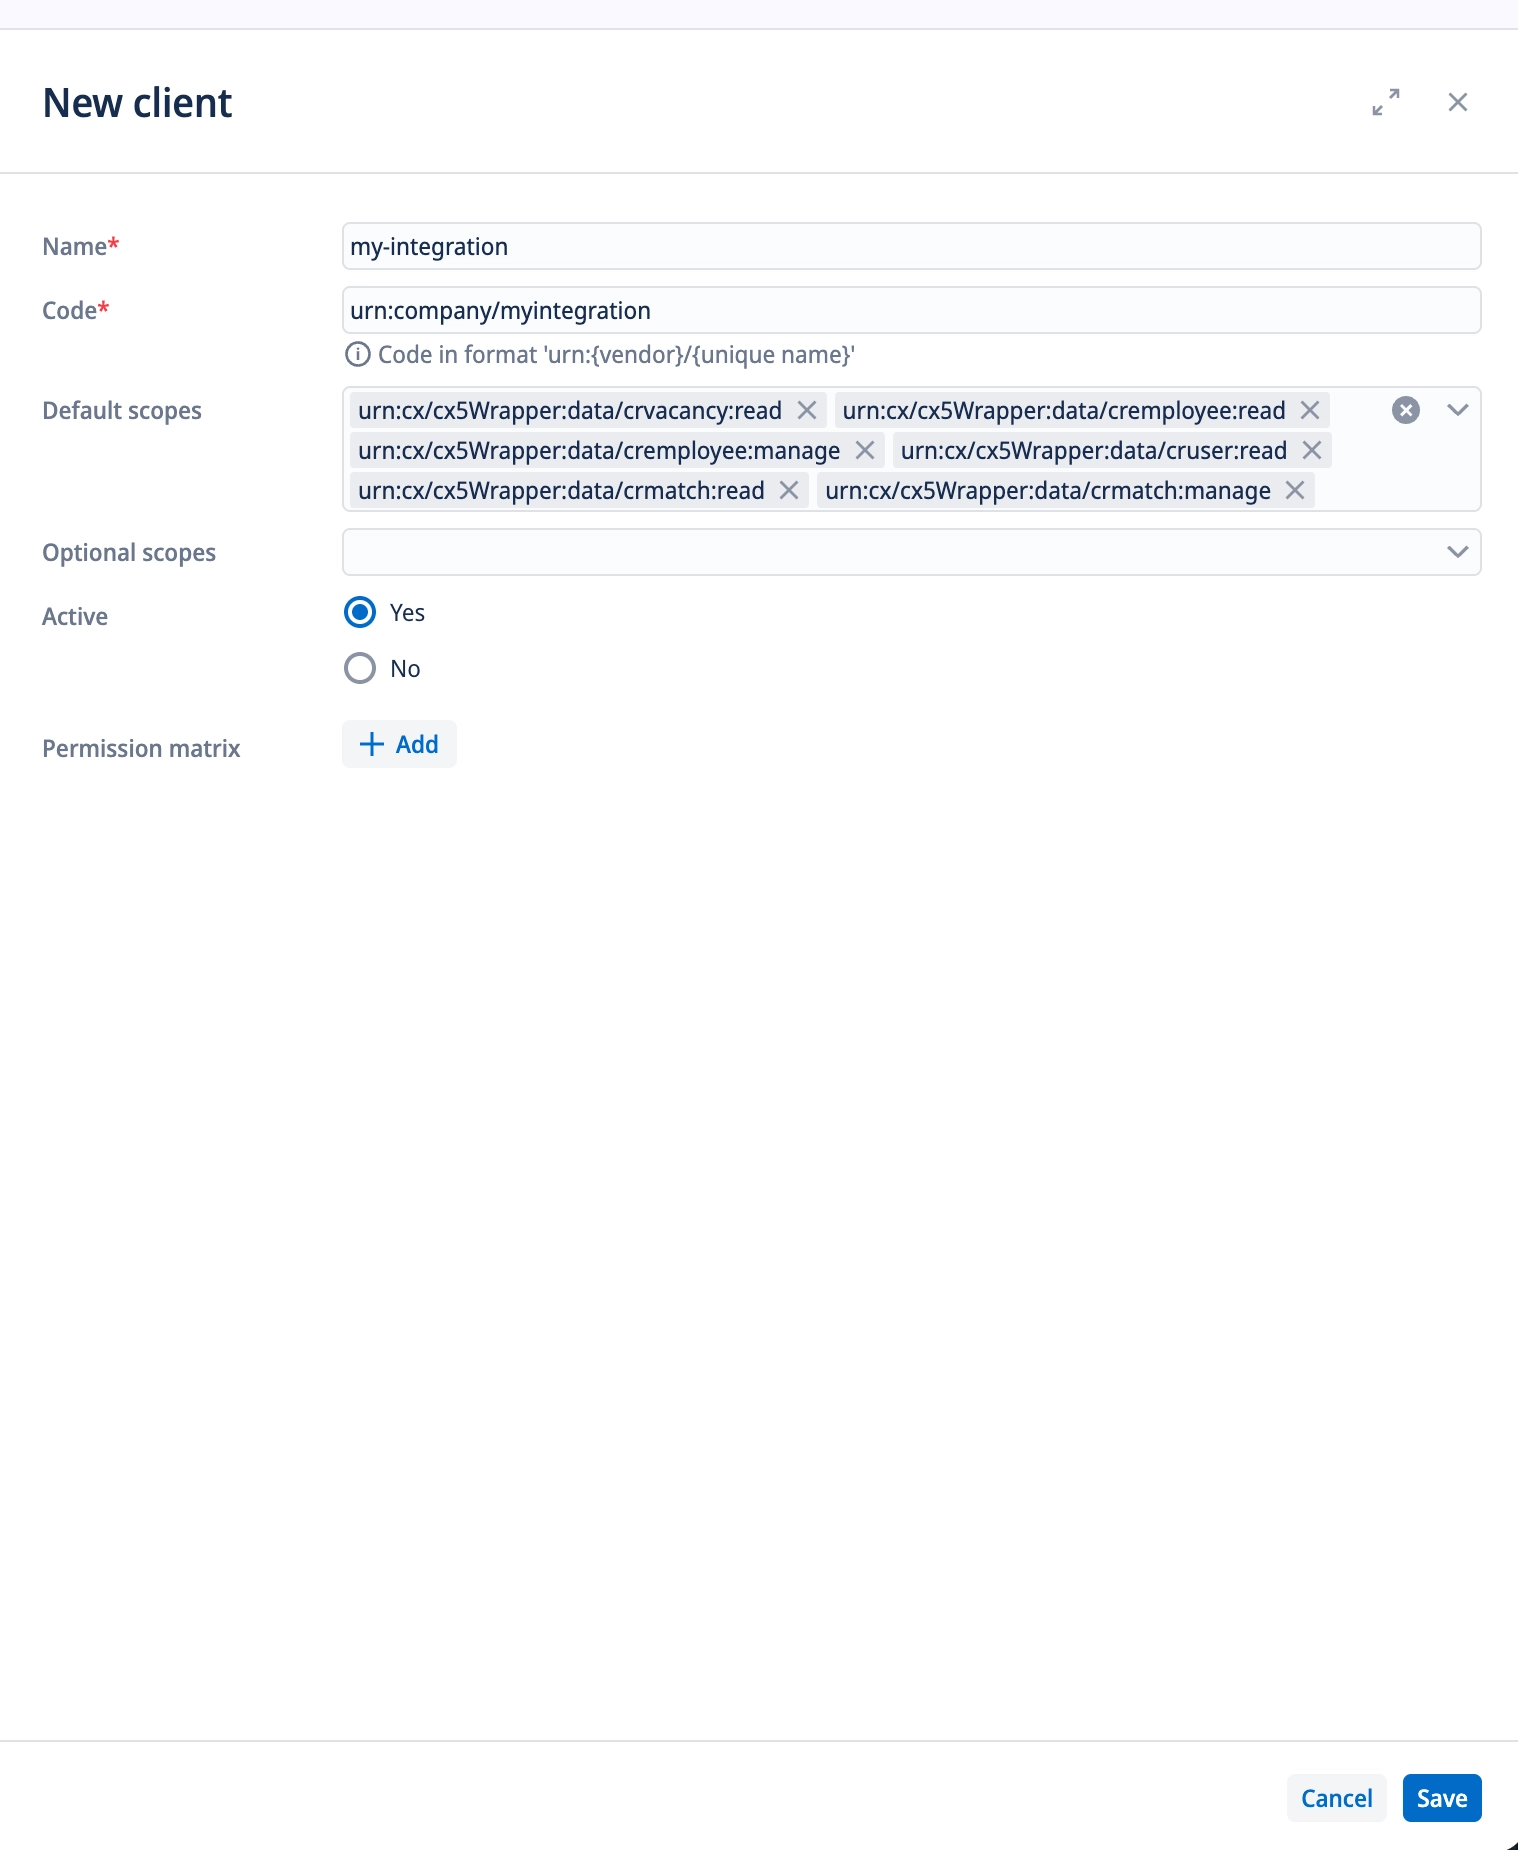
Fill in the client form.
- Name: a recognisable name, for example
wintro. - Code: the code Wintro shows,
urn:wintro/referrals. - Default scopes: the scope Wintro shows,
urn:cx/cx5Wrapper:data:manage. - Active: Yes.
Leave the Permissions as they are, and click Save.
- Name: a recognisable name, for example
-
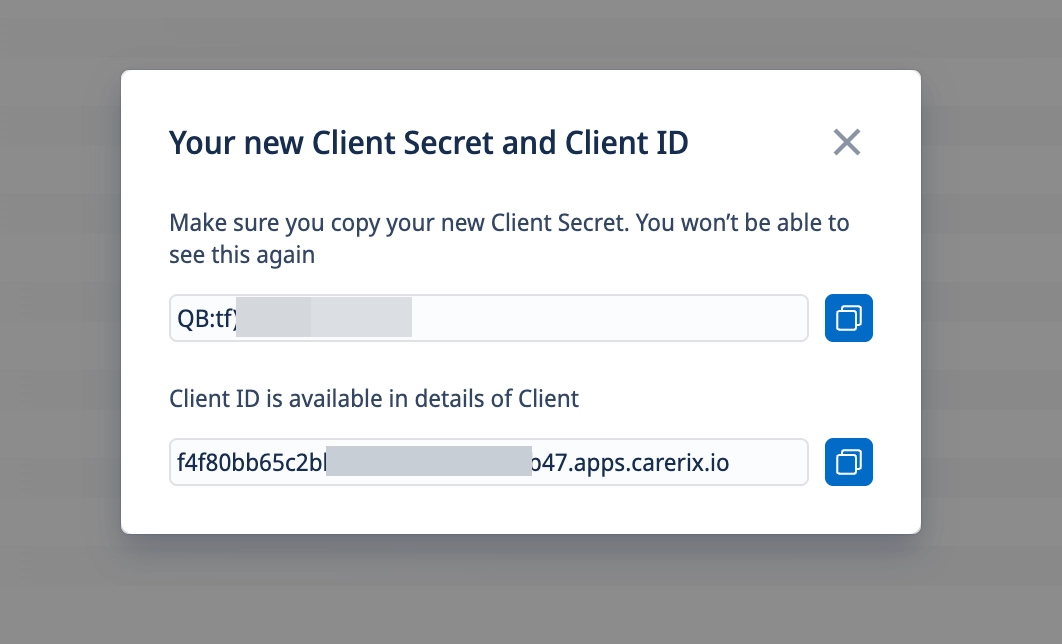
Copy the Client ID and Client secret. After saving, Carerix shows the new Client ID and Client secret. Paste both into the matching fields in Wintro. The secret is shown once, so copy it before leaving the page.
Finish in Wintro
Click Verify and connect. Wintro finds your Carerix environment, signs in as the client and reads one list to prove the access works. Each check shows a tick, and nothing is saved unless all three pass.
Connecting does not start the sync. The card shows Sync off until Wintro has gone through your vacancies and stages with you. Then Wintro switches the sync on, and vacancies and referrals stay in sync every hour.
Stage mapping
Once connected, the Carerix card lists the stage mappings. Carerix match stages are shared across all job orders, so each choice applies everywhere.
- Entry stage: the match stage new referrals are created in.
- Interview, hired and rejected stages: which match stages mean a referral reached an interview, was hired, or was rejected. Wintro follows referrals with these stages, so referrers hear about the outcome.
- Excluded stages: Wintro does not suggest people who are already in these stages as candidates for a referral.
Wintro proposes a mapping based on the stage settings in your Carerix, and you confirm it with Configure on each row.
Good to know
- Tags are not supported by Carerix. Wintro adds a note to the application with the referrer and a link to the candidate passport instead.
- Documents such as a CV are stored on the candidate in Carerix, not on the individual application.
- When a referral’s email address already belongs to a candidate in Carerix, Wintro adds the match to that candidate instead of creating a second one.


